[et_pb_section admin_label="section"][et_pb_row admin_label="row"][et_pb_column type="4_4"][et_pb_image admin_label="Image" src="http://www.thecasualcreative.com/wp-content/uploads/2016/04/guestparticipant.jpg" show_in_lightbox="off" url_new_window="off" use_overlay="off" animation="off" sticky="off" align="left" force_fullwidth="off" always_center_on_mobile="on" use_border_color="off" border_color="#ffffff" border_style="solid"] [/et_pb_image][et_pb_text admin_label="Text" background_layout="light" text_orientation="left" use_border_color="off" border_color="#ffffff" border_style="solid"]
Well, this week my One Room Challenge feelings pretty much went back and forth between calm, collected confidence and sheer panic. On the one hand, I think I have a pretty solid design plan and timeline mapped out that I went through in my week one post. On the other hand, regular life is also happening and I have a very real budget (booo.....)
Like I said in my week 1 post, I am by no means a professional, and I do not have a professional (or even semi-professional) budget or resources. I'm stressing this for two main reasons. 1) To lower your expectations to the point that no matter what I pull off wows you 2) To attempt to make the point that you can have an awesome looking room without a whole lot to work with.
In this post I'm going to take you through my budget, and the first few big accomplishments in the space.
THE BUDGET
My parents and Andy will tell you that the most amazing skill I possess (and have possessed since an alarmingly young age) is the ability to instantly fall in love with the most expensive version of anything, before I am even remotely aware of what it costs. ANYTHING. Shopping for an Easter dress for my 4-year-old self? Mom look at how pretty this one (which happens to be imported from Paris and hand-embroidered) is! Looking at a menu when out to a nicer dinner with family friends? Sure my 8-year-old sister is happy with chicken strips, but 10-year-old Carrie is really craving surf and turf. Doesn't matter what it is - food, clothes, home decor, even ridiculous things like plants and pens. The things I love are almost always the ones I can't afford. Having great taste is a curse, I tell you.
But that's not the point... the point is that in an attempt to reign this in, Andy has started saying the dreaded b-word to me. BUDGET. I told him I would do my very best to not spend more than $1500-$2000 on this ENTIRE ROOM. Which is equal parts crazy, challenging, and totally necessary. Anyway - here's the current breakdown of how much I am willing and able to spend on certain aspects of this office redo:
- Paint - $100
- Rug - $300
- Couch - $200
- Desk - $200
- Built-ins - $400
- Curtains - $100
- Stuff - $300 (lamps, shelf styling stuff, office supplies, frames and prints, end tables, pillows, etc.)
Now look, some of you (especially if I'm getting of you real designer types looking at this), are thinking how totally unrealistic those numbers are. I know I was thinking the same thing looking at them. But I, like so many other people, want to be in a beautiful space that still allows me to pay my bills. To accomplish this, I am going to have to go outside the box in some cases, and be happy with big-box in others. Craigslist and garage sales are my friend. Clearance stickers are my friend. I will be using a lot of stuff that I already have, even if it's not the stuff I most want. Mom, I hope you appreciate how hard I am adulting right now.
PAINT
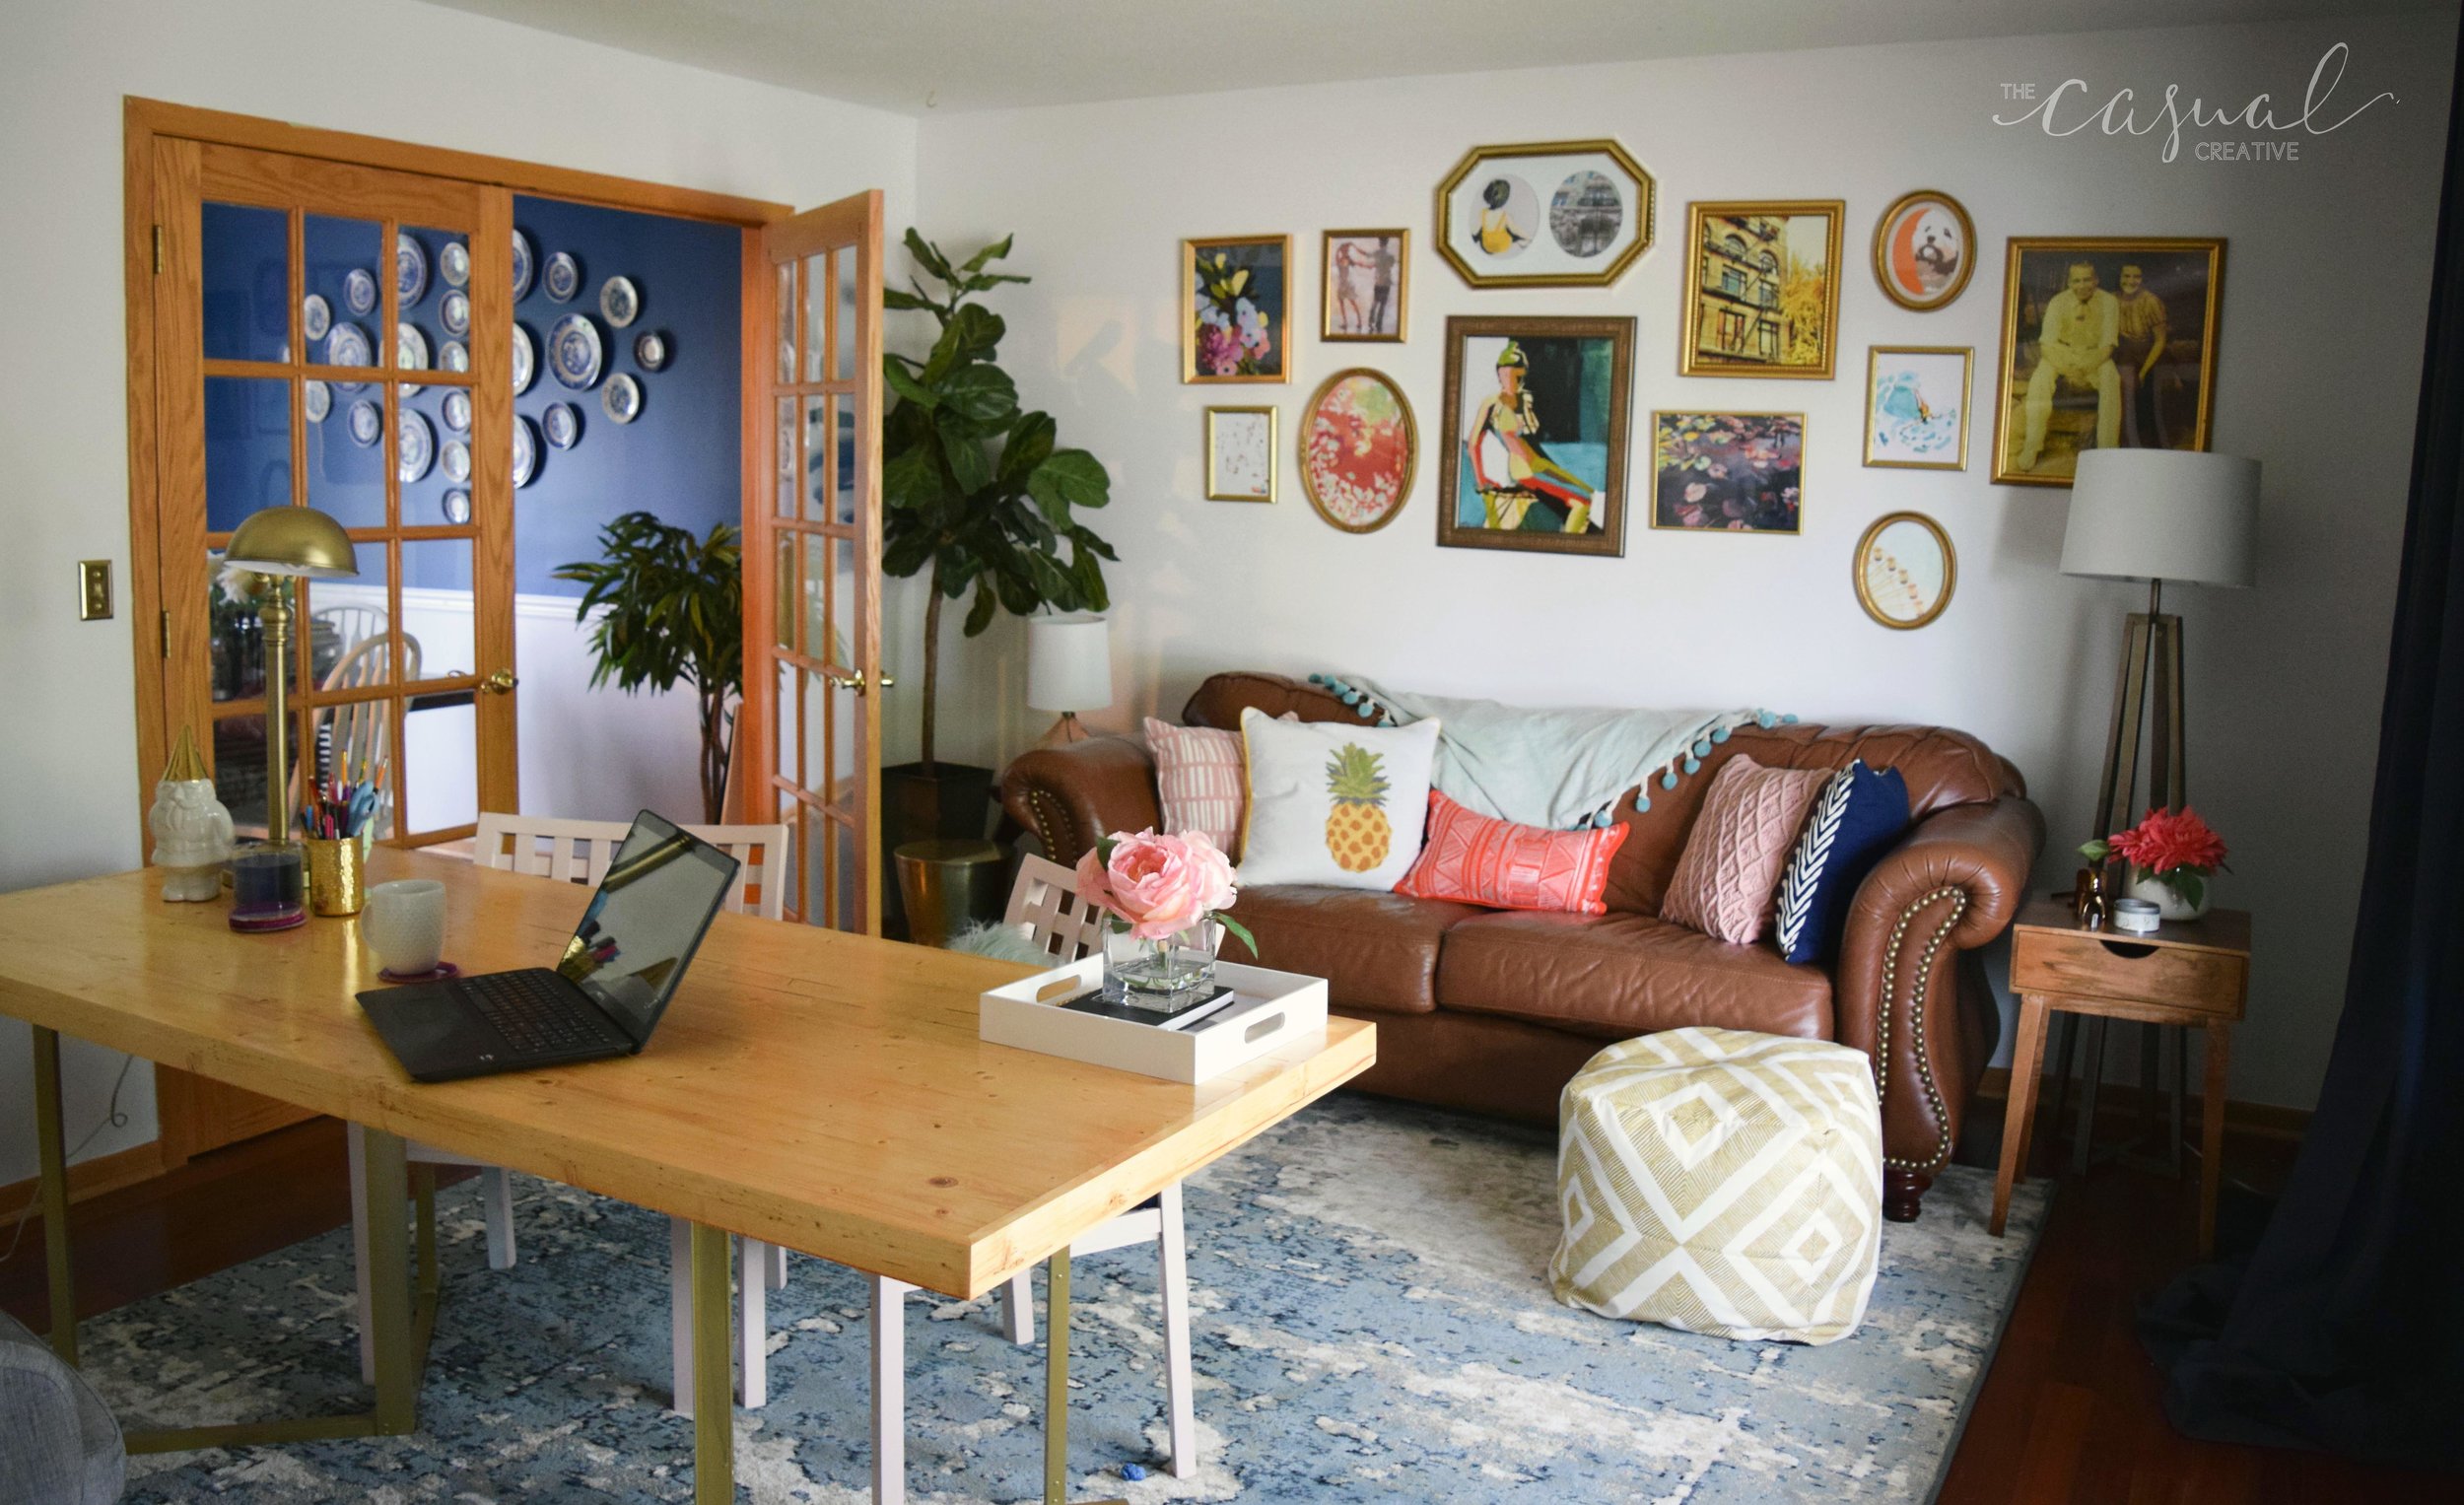
It is such a cliche, but boy is it true. Nothing refreshes a space like a new coat of paint. Because I want to infuse a lot of color in a lot of the other elements of this room, I opted to go white on the walls to serve as a nice bright canvas. None of the other rooms in my house are white, so this is actually kind of a fun change for me. I chose Nano White from the Behr Home Decorators Collection. It's actually only on 3 of the walls in the room, because the 4th wall continues right in to the entry-way, which leads right in to the rest of the house. There just wasn't a good breaking point, and I didn't want to have to paint the entire entryway too, so one light gray-green wall will remain.
[/et_pb_text][et_pb_image admin_label="Image" src="http://www.thecasualcreative.com/wp-content/uploads/2016/04/DSC_0791.jpg" show_in_lightbox="off" url_new_window="off" use_overlay="off" animation="off" sticky="off" align="left" force_fullwidth="off" always_center_on_mobile="on" use_border_color="off" border_color="#ffffff" border_style="solid"] [/et_pb_image][et_pb_image admin_label="Image" src="http://www.thecasualcreative.com/wp-content/uploads/2016/04/DSC_0797.jpg" show_in_lightbox="off" url_new_window="off" use_overlay="off" animation="off" sticky="off" align="left" force_fullwidth="off" always_center_on_mobile="on" use_border_color="off" border_color="#ffffff" border_style="solid"] [/et_pb_image][et_pb_text admin_label="Text" background_layout="light" text_orientation="left" use_border_color="off" border_color="#ffffff" border_style="solid"]
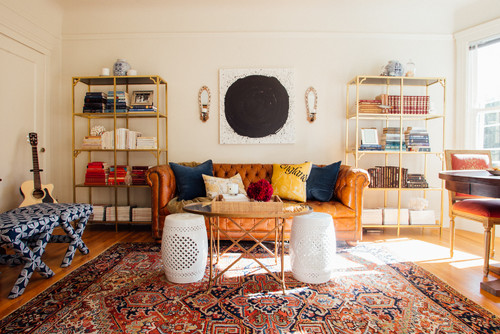
COUCH
When I sat down to do my design plan, I had a very clear idea of the type of couch I wanted in this office space to lounge and read on. Here are some of my favorite couches that I've been eyeing up for a while now:
- Trevor Leather Sofa | 2. Modern Chesterfield Leather Sofa | 3. Hamilton Leather Sofa | 4. Hancock Tufted Distressed Chesterfield Leather Sofa | 5. Brooklyn Leather Sofa
[/et_pb_text][et_pb_image admin_label="Image" src="http://www.thecasualcreative.com/wp-content/uploads/2016/04/couches.jpg" show_in_lightbox="off" url_new_window="off" use_overlay="off" animation="off" sticky="off" align="left" force_fullwidth="off" always_center_on_mobile="on" use_border_color="off" border_color="#ffffff" border_style="solid"] [/et_pb_image][et_pb_text admin_label="Text" background_layout="light" text_orientation="left" use_border_color="off" border_color="#ffffff" border_style="solid"]
Of course, I already told you that my budget for this couch was about $200 dollars, and in many places they would laugh at me for even getting a leather fabric swatch for that much. So I did what I often do and started the craigslist hunt. Well, wouldn't you know it that this (kinda) beauty popped up not too far from my parents house? I especially love it when that happens because I negotiate the price, ask my mom and dad when they are willing to pick it up, and at some point they deliver it to me and it's almost like I ordered it out of a catalog or online like a civilized furniture buyer would do. HA.

I got the couch for $150 and felt AWESOME about it. Is it a pristine rolled-arm chesterfield? Nope. Is it a comfortable leather couch in pretty good shape that fits my basic design aesthetic? Yes. So we're calling it a win. Here's what the couch looks like in my room versus this random person's basement.
[/et_pb_text][et_pb_image admin_label="Image" src="http://www.thecasualcreative.com/wp-content/uploads/2016/04/DSC_0796.jpg" show_in_lightbox="off" url_new_window="off" use_overlay="off" animation="off" sticky="off" align="left" force_fullwidth="off" always_center_on_mobile="on" use_border_color="off" border_color="#ffffff" border_style="solid"] [/et_pb_image][et_pb_text admin_label="Text" background_layout="light" text_orientation="left" use_border_color="off" border_color="#ffffff" border_style="solid"]
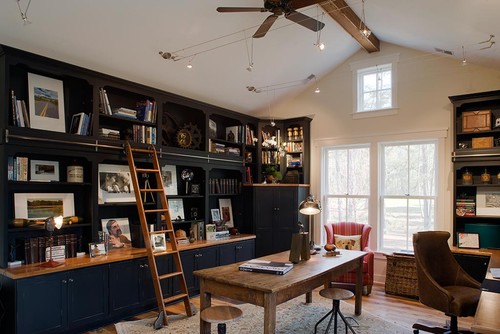
RUG
Confession: I actually bought the rug for this room a few weeks before the One Room Challenge started. whew. I feel so much better now. I had been toying with the idea of getting going on this office for a while, and had been keeping a very close eye on sales going on over at RugsUSA, esalerugs, and wayfair, and was just hoping that some rug would appear that was big enough, beautiful enough, and cheap enough.
Here are some of the rugs that were serious contenders at one point or another:
- Abstract Waterfall Rug | 2. Keyhole Trellis Rug | 3. Barcelona Area Rug | 4. Distressed Foggy Medallion Rug | 5. Windsor Printed Overdyed Grove Rug
[/et_pb_text][et_pb_image admin_label="Image" src="http://www.thecasualcreative.com/wp-content/uploads/2016/04/rugs.jpg" show_in_lightbox="off" url_new_window="off" use_overlay="off" animation="off" sticky="off" align="left" force_fullwidth="off" always_center_on_mobile="on" use_border_color="off" border_color="#ffffff" border_style="solid"] [/et_pb_image][et_pb_text admin_label="Text" background_layout="light" text_orientation="left" use_border_color="off" border_color="#ffffff" border_style="solid"]
One day I announced to Andy that I was having A RUG CRISIS(!!!). He laughed at me and then sternly lectured me on how picking a rug was not deserving of the word CRISIS in all caps, or even in lowercase for that matter. Following that, I decided for the 867,000th time that I needed a new free design assistant. Then I did the sensible thing - I narrowed it down to the final 3 rugs and let Andy make the final decision because he had put up with me through this whole ordeal.
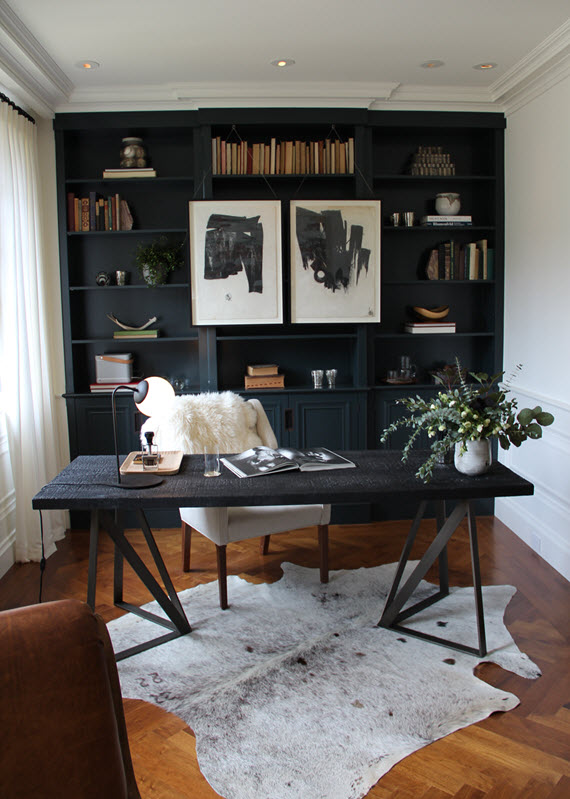
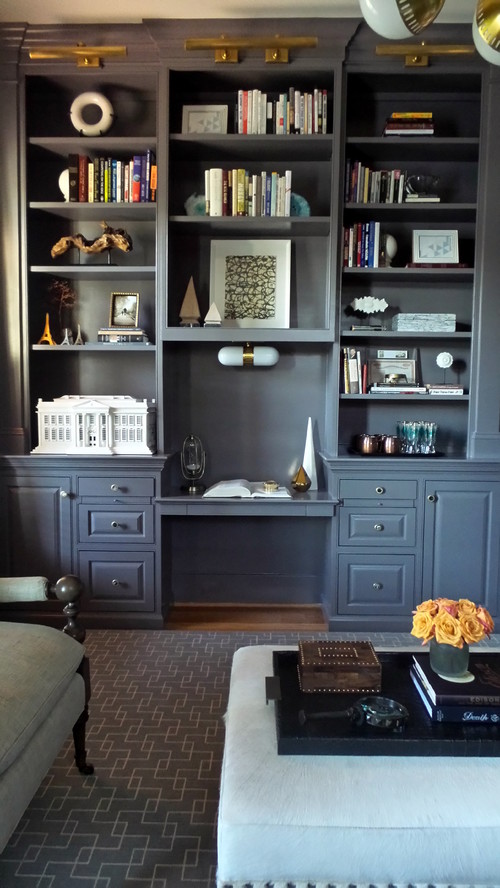
Here's the rug he chose:

It is so much prettier in person than online. It almost looks sort of pixelated, which I think is kind of a funky cool look.
So that's where I'm at after week 2, with 4 weeks and 5 posts to go. Next week I'll cover how I'm getting a custom desk and "built-ins" for way cheap without making my parents go on any sketchy craigslist runs. Hint: It mostly involves my dad being awesomely handy and nice to me. Stay tuned for that, and feel free to leave a comment telling Andy how much you love the rug he chose so that his ego grows to enormous proportions. That's just what I need in my life.
[/et_pb_text][et_pb_image admin_label="Image" src="http://www.thecasualcreative.com/wp-content/uploads/2016/04/DSC_0790.jpg" show_in_lightbox="off" url_new_window="off" use_overlay="off" animation="off" sticky="off" align="left" force_fullwidth="off" always_center_on_mobile="on" use_border_color="off" border_color="#ffffff" border_style="solid"] [/et_pb_image][/et_pb_column][/et_pb_row][/et_pb_section]