My House

One Room Challenge: The Office| Week 1

office-mood-board-part-2.jpg

[et_pb_section admin_label="section"][et_pb_row admin_label="row"][et_pb_column type="4_4"][et_pb_image admin_label="Image" src="http://www.thecasualcreative.com/wp-content/uploads/2016/04/guestparticipant.jpg" show_in_lightbox="off" url_new_window="off" use_overlay="off" animation="off" sticky="off" align="left" force_fullwidth="off" always_center_on_mobile="on" use_border_color="off" border_color="#ffffff" border_style="solid"] [/et_pb_image][et_pb_text admin_label="Text" background_layout="light" text_orientation="left" use_border_color="off" border_color="#ffffff" border_style="solid"] Earlier this year, I wrote a post called The Year of Diving In. In it, I talked about how this year I was going to make more of an effort to do things I wasn't 100% would go well for me, but that I knew I would enjoy or at least get satisfaction out of completing. The One Room Challenge falls squarely in this category.

For those of you that don't know, the One Room Challenge was started by Linda at Calling It Home, and over the last 5 years it has grown to basically be the biannual highlight of the interior design blog world. I was trying to explain how it worked to Andy (for those of you just joining Andy is my boyfriend and self-proclaimed worst design assistant ever), and naturally I had to resort to sports metaphors to do it. Design bloggers from all corners of the internet will participate in the challenge to makeover one room of their house, and blog about it once a week for the next 6 weeks. On Wednesdays 20 selected bloggers, basically the varsity squad, will post. On Thursdays, anyone else can join in and link up their posts to be included as guest participants. I'm something akin to a scrawny 6th grader trying to play with the JV squad. But hey - diving in, right?!

This challenge actually came at a really good time for me. 3 MONTHS ago (yikes!) I posted about my general design plan for my office redo. Well...after 3 months of a lot of work travel, family events, and world-class procrastination, my office still looks about exactly the same.

As a refresher, here's how the room looked in the listing photos before I bought my house.


[/et_pb_text][/et_pb_column][/et_pb_row][et_pb_row admin_label="Row"][et_pb_column type="1_2"][et_pb_image admin_label="Image" src="http://www.thecasualcreative.com/wp-content/uploads/2015/12/2014-12-12-09.45.54.jpg" alt="Office Before" show_in_lightbox="off" url_new_window="off" use_overlay="off" animation="off" sticky="off" align="left" force_fullwidth="off" always_center_on_mobile="on" use_border_color="off" border_color="#ffffff" border_style="solid"] [/et_pb_image][/et_pb_column][et_pb_column type="1_2"][et_pb_image admin_label="Image" src="http://www.thecasualcreative.com/wp-content/uploads/2015/12/2014-12-12-09.45.49.jpg" show_in_lightbox="off" url_new_window="off" use_overlay="off" animation="off" sticky="off" align="left" force_fullwidth="off" always_center_on_mobile="on" use_border_color="off" border_color="#ffffff" border_style="solid"] [/et_pb_image][/et_pb_column][/et_pb_row][et_pb_row admin_label="Row"][et_pb_column type="4_4"][et_pb_text admin_label="Text" background_layout="light" text_orientation="left" use_border_color="off" border_color="#ffffff" border_style="solid"]

I did have a big L-shaped ikea desk in there as a placeholder for a while, but that's about it. The office is open to the dining room through french doors, and once I had the dining room all done and put together, I really felt like the office had to be more cohesive with that space.

Here is what you see of the dining room from the office:

[/et_pb_text][et_pb_image admin_label="Image" src="http://www.thecasualcreative.com/wp-content/uploads/2016/01/roomwide_watermark.jpg" alt="The Casual Creative Dining Room" show_in_lightbox="off" url_new_window="off" use_overlay="off" animation="off" sticky="off" align="left" force_fullwidth="off" always_center_on_mobile="on" use_border_color="off" border_color="#ffffff" border_style="solid"] [/et_pb_image][et_pb_text admin_label="Text" background_layout="light" text_orientation="left" use_border_color="off" border_color="#ffffff" border_style="solid"]

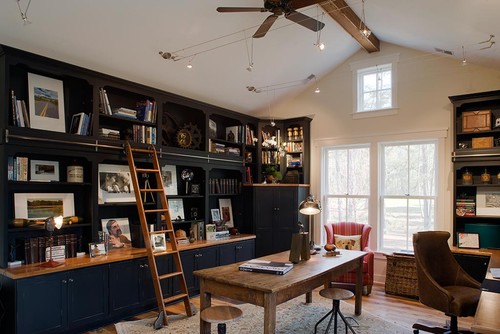
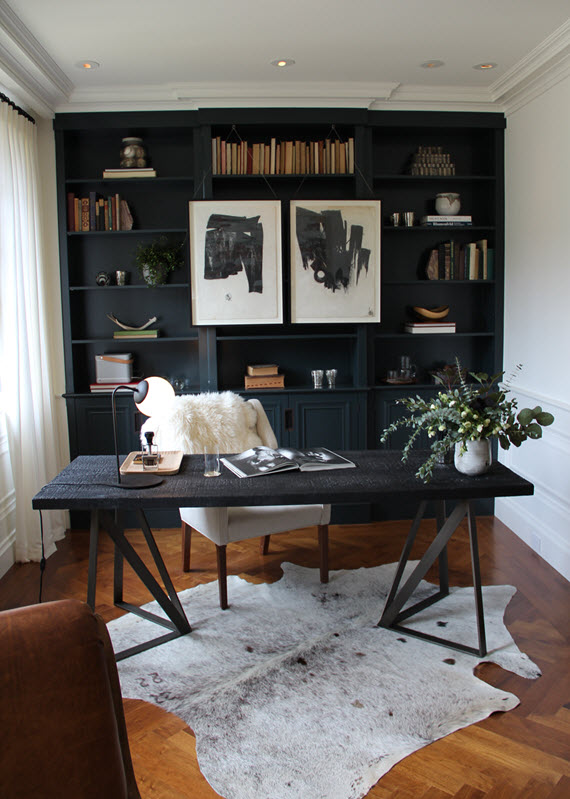
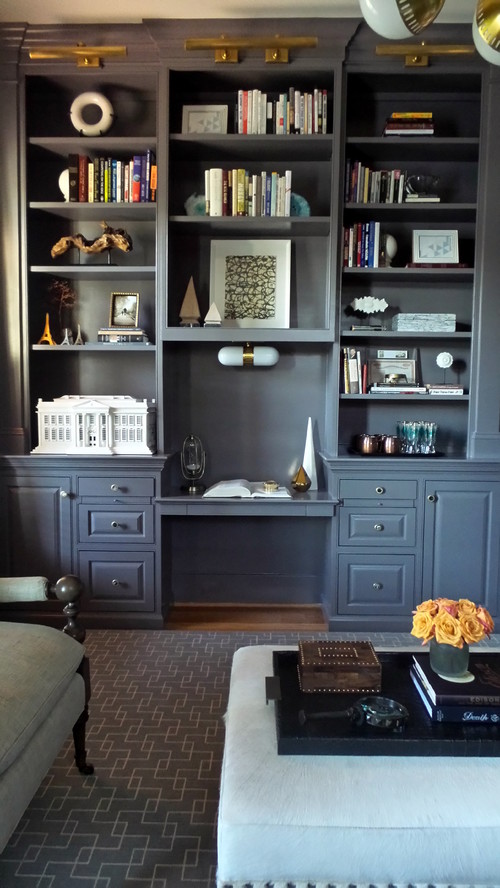
Without further ado, here is the updated design plan:

[/et_pb_text][et_pb_image admin_label="Image" src="http://www.thecasualcreative.com/wp-content/uploads/2016/04/office-mood-board-part-2.jpg" alt="Office Design Plan" title_text="Office Design Plan 2.0" show_in_lightbox="off" url_new_window="off" use_overlay="off" animation="off" sticky="off" align="left" force_fullwidth="off" always_center_on_mobile="on" use_border_color="off" border_color="#ffffff" border_style="solid"] [/et_pb_image][et_pb_image admin_label="Image" src="http://www.thecasualcreative.com/wp-content/uploads/2016/01/office-layout-e1451962713629.jpg" alt="Office Space Plan" show_in_lightbox="off" url_new_window="off" use_overlay="off" animation="off" sticky="off" align="left" force_fullwidth="off" always_center_on_mobile="on" use_border_color="off" border_color="#ffffff" border_style="solid"] [/et_pb_image][et_pb_text admin_label="Text" background_layout="light" text_orientation="left" use_border_color="off" border_color="#ffffff" border_style="solid"]

Moving things around in photoshop is pretty easy, but making all of this come to life and you know, hopefully look good, in 6 weeks is pretty daunting.

My list of tasks includes:

  • Paint the room
  • Find a rug
  • Find a desk
  • Find a couch
  • Build and paint built-ins
  • Curtains
  • Art and frames for a gallery wall
  • Figure out the lighting plan - this room has NO overhead light, and I'm not an electrician
  • Style out the shelves and the desk

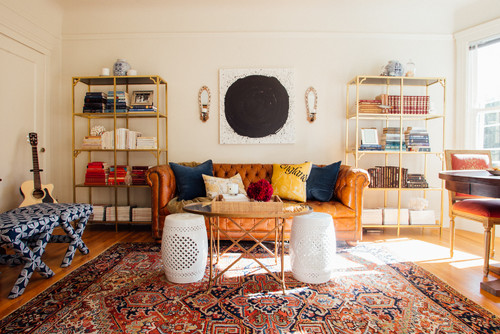
Now I believe in managing expectations, so let's be real clear. I've got no sponsors, no pro design friends helping me out, a budget of about $1500, tops (lol - that includes furniture. this should be interesting.) and none of these photos will be taken by a professional photographer or be professionally staged. Andy will try to be helpful, and I love that man, but let's be real - I better be prepared to tackle most of the design work on my own.

Now that I've adequately lowered your expectations I'm sure you CAN'T WAIT to check back next week and see how the office is progressing (or not). Seeing all the other amazing rooms and designers challenges has definitely made me feel inspired to take this on though. So ready set - DIVE IN!

[/et_pb_text][/et_pb_column][/et_pb_row][/et_pb_section]

Before and After: My Bright and Comfy Family Room

DSC_0751.jpg

When I moved in to my shiny new house a little more than a year ago I had two primary feelings. First off, I was insanely grateful to my family and friends that helped me get there, both literally and figuratively. I had moved 4 times in 5 years, and bought and sold 2 houses during that time. I knew this would be a more permanent locale (God willing) and moving in felt like one big giant sigh of relief. But like after most sighs of relief, the overwhelming weight of what you've just done sets in. Where on earth was I supposed to start? I hardly had enough furniture to fill 3 rooms, let alone the whole house.

Fortunately, the answer to "where to start" came fairly quickly, because I didn't own a couch. In fact, one of Andy and my first dates involved sitting on approximately 3947 couches and Andy filling his manly role by extolling the virtues of leather reclining couches with built-in cup holders and speakers. Unfortunately for Andy, it wasn't his house, and he wasn't buying the couch, so there was no man-cave special purchased.

I did, however, put my big girl pants on and bought a giant sectional that is perfect for sitting on and sinking into. It's what my giant living room needed. When you have a giant living room with just a couch, a too-small TV on the floor, and an 80s brick fireplace, that's where you focus your attention first.

Here's the before shot from when the house was listed. Please note: this is not the couch I purchased.

To start with, I knew that fireplace needed some TLC. I gave it a good scrubbing (seriously, ew. Bricks are dirty.) and then whitewashed it with watered down white paint. I toyed with the idea of painting it white-white, but in the end I still wanted to see some of the variation in the brick and the texture come through. It's amazing what the effect of lightening up that big heavy fireplace had.

I knew I didn't want to mount the TV above the fireplace because it's one of my personal pet peeves. Lucky for me, my dad had built a giant buffet for my previous house that I knew would actually work super well as a TV stand. It has lots of great storage and provided some punch to the room. Now I know that most people wouldn't decide to design a room around a large piece of orange furniture, but I am an unapologetic color person, and I still love this thing and its color.

My dad had also previously built me a large, beautiful coffee table that was meant to look like one from a higher-end furniture store that rhymes with Lottery Yarn. My dad is really the MVP of my house, big time.

After that, I said a little prayer for my bank account, bit the bullet, and bought a BIG rug that I knew would tie the space together. I think I rant in almost every post about how expensive rugs are, but in this space it was SO SO important to get the big 10x14' rug to cozy up the space.

I wish I had more progress photos to show you, but at that point in time I was really just trying to remember my zipcode and unpack boxes. The thought of taking pictures of rooms mid-disaster didn't even occur to me.

Anyway, you'll have to live with the after photos.

I'll point out some special things on these shelves that either Andy or I really love, but I would be remiss if I didn't point out the single most contested decor item in my home. Enter the fuzzy green ball.

If you look on the left side of the shelving toward the top, there is a fake turf-covered ball. Andy has a completely irrational hatred of the fuzzy green ball. In fact, when we have friends over it's not unusual for Andy to say "Yeah, Carrie did a great job in here except for that stupid ugly green ball. What the heck is the point of it?! I don't get it.... blah blah." Dear Andy, I love you, but please get over the green ball. But I digress....

Andy's most prized possessions in this room are the 3 baseballs on the right hand shelves. They all have to be on that side (drives me nuts) because otherwise the direct sunlight will fade the treasured signatures of Ted Williams, Mickey Mantle, and Hank Aaron.

The awesome orange and gray bud vases are done by my uber-talented brother-in-law, Andrew. And yes, my sister is married to an Andrew and I'm dating an Andy. If Haley doesn't find a Drew to settle down with pretty quickly everything will just feel out of whack. But AndREW is a chemistry teacher and potter, and I love displaying and using his work in my home. Find him on instagram @ALpottery.

The adorable dog on the mantle is my parents dog/the family dog, Trooper. He's freaking adorable, and I miss him, so it didn't strike as weird to put his picture on the mantle. That is, until everyone started asking in hushed tones when my dog had passed away, or where the dog is now. Picture of dog on mantle, and no dog in house = assumptions of dead dog. But hey - no worries. Troopy is alive and well and living out his ridiculously spoiled life at my parents house.

Please excuse the basketball game on TV. Me photographing the room for the blog was not a good enough reason to turn the game off for Andy. But honestly, this room is a long way from perfect or magazine worthy. But I love it, because it was the first room that was done, and it's where all the best stuff happens in our house.

It's where Andy's posse of cable-mooching friends gather to watch football on Sunday, and where some intensely competitive board games are played. It's where Game of Thrones gets watched with friends, and where I convinced Andy to binge watch all of The West Wing with me. Living rooms are the best, and here's my favorite view of mine.

House Tour: My Happy Blue and White Dining Room

buffet_watermark.jpg

Like I said in my before house tour, I was thrilled that this house had a formal dining room. Then, when it came time to design it I was a little paralyzed. Was this a formal dining room with a chandelier, nice china, and the sort of room that I would tell my someday children that they couldn't touch anything in? Was this a comfortable dining room where friends would sit and play games, and we would all be reminiscing with a beer in our hand? Or maybe would I throw fancy schmancy dinner parties here and want some glitz in the space?

Being the maximalist that I am, I decided that an enthusiastic YES was the answer to all three questions. But could one room really encompass all the things I love in dining rooms - tradition, that comfortable homey feeling, and a little glitz? I'll let you decide for yourself, but I think I managed to mix styles in a way that doesn't say "A CRAZY PERSON LIVES HERE."

Design tip: If you're going to mix dramatically different styles, make sure you anchor all of it with a really cohesive color palette.

Here's my dining room! What you can't see in this post are the french doors opposite the window, and this awesome wine rack that Andy's parents got me for Christmas that has yet to be mounted on the wall (sorry!).

As is the case in most of my house, the furniture comes in two varieties: Craigslist scores and super-dad originals. I like to shop on craigslist near my parents house then casually call my mom and say, "Soo.. whatcha doin today mommy-o?" and because she's my mom, it usually takes about that long for her to figure out that she's going to be asked to take her trusty minivan to some not-as-close-as-I-thought-it-was location and pick up something really heavy and awkward. But man, that awesome square-front buffet was totally worth it right?!

very favorite

My dad picked up furniture-making as a hobby not too long ago, because apparently he needed something to do other than save lives and make people healthier all the time? Anyway, I'm glad he did.  The table is a show-stopper, and I'm so grateful that he put in so much time in getting it perfect for me.

When I started to put the room together, I knew the long wall needed a really strong feature element. I didn't want to do anything with picture frames (eventually you'll be able to see the office gallery wall from here), and I wanted a more traditional focal point. Displaying some beautiful china seemed to be the answer - this is a dining room after all! The hard part? I didn't have any china, and the classic Blue Willow china is hard to find and expensive.

After hearing me complain about this for about a week Andy casually says, "Just let me ask my uncle if he has some", and the next day I get a call from said uncle saying "Yeah, I've got a whole box of it here. Come pick it up whenever. But if you break up with Andy you have to give it back." Fair enough!

Design tip: Date guys with uncles who collect a lot of cool stuff and like their nephews. HA. But really. Collectors are your friend.

I did the art above the buffet myself. If you need big art, canvases from any craft store and paint are pretty inexpensive. I'm no artist, but I like how having something more modern above the buffet really sets off the traditional plates on the other side of the room.

That's my dining room! If you're curious about anything in particular, or if you want to tell my dad how awesome that table is and that he should take custom orders, let me know in the comments. (My dad doesn't really take custom orders. It's pretty much a friends and family thing. Bummer, I know.)

Office Update: A Peek into My Design Process

office-mood-board-e1451964085770.jpg

When I bought my house, I was thrilled that it had a fairly large "extra" room in the front corner of the house. It has beautiful french doors that open from the dining room, and it's really the only room of my house that gets great natural light for a good portion of the day. So of course, I quickly claimed it as my office/work space/den.

I wanted to share the plans for the office, but I also wanted to share my design process (if I can even call it that) so that others can follow the same formula and love their own spaces!

1. Pull together images that speak to you

When people come over, or I share some of my work, the most common question I get asked is "how do you come up with these ideas?" My answer - and it's a truthful one - is always the same. I steal them.

All designers/stylists/decorators/creatives are constantly immersing themselves in other people's work and being inspired by a variety of sources. I would never look at a feature in House Beautiful and decide to attempt to duplicate a magazine spread in my house. But I would take a bunch of the different elements that leap out at me and put them together in a different way or with a twist.

When I started thinking about redoing my office I scoured pictures of offices, dens, and sitting rooms without searching for anything in particular. Most of the stuff was pretty "meh" to me, but there were definitely images that peaked my interest.

San Francisco Decorator Showcase 2015 // His Office // Brittany Haines

A LOT

Things I like (based on those photos):

  1. Bright spaces that make good use of natural light
  2. Masculine "den"-type spaces. I think a lot of this has to do with having very fond memories of hanging out in my dad's den with him as he worked, or had patient, in-depth conversations with my 10-year-old self about current events or the mysteries of the world. Or how there were certain classic songs you should always play REALLY loud.
  3. Lots of space to display books and other special, inspiring items and collections.
  4. A mix of modern and traditional pieces.

That's a lot of info from just looking for patterns among a handful of pictures!

Next step...

2. Decide what elements you can't live without

All of those design ideas are nice.. but how do you start to actually conceptualize the room? For me, I figure out what I can't live without. This is where you switch to thinking about function instead of aesthetics.

Things I need in the space:

  1. A large, clean work surface to be able to spread out on
  2. A couch to do more passive work, lounging, and reading on.
  3. Shelving to store and display books and treasures
  4. Plenty of lighting to encourage productivity on short winter days

3. Plan the space

There are lots of great tools available to visualize and plan floor plans. My personal favorite is just good old graph paper and a pencil, but I've also used and appreciated floorplanner.com because it's free, pretty user-friendly, and has standard sized furniture built in so you can just place items and move them around your room. For people that have trouble visualizing flat shapes as three-dimensional spaces, it has a nifty feature that lets you "tour" the room.

Quick tip: Furniture always looks bigger in a 3d space than it does in a floor plan. If your floor plan feels a little sparse, it's probably about right.

If I'm really worried about the scale of furniture or making a lot of pieces fit, I take the time to draw everything to scale. But in this room I knew I had quite a bit of wiggle room, and just did a quick sketch of the layout in powerpoint.

4. Design the "look" of the room - mood board time!

So you know what you like, you know what you need, and you know the big pieces you need in the space and how they'll lay out. The best way to make all of those things start to gel into a "look" is to put a bunch of potential elements together in a mood board and start editing until you're happy with it.

Here's the mood board I created for my office space:

I did this in Photoshop by copying and pasting a bunch of images together after removing their background "stuff". I also use Pinterest and other inspiration board-type websites, but I still find that actually seeing all of the elements together in one space is most helpful.

I knew I wanted a comfortable, leather couch in a warm brown color to bring in some of that masculine-den feel. I won't be able to afford an actual Chesterfield like I have pictured here, but I'm hoping to find something in that vein.

I've decided to use a cowhide rug in the space because a) they're super durable b) to get a rectangular rug large enough for this space would be cost prohibitive (see my previous rant on expensive rugs here) and the irregular shape of the cow hide allows you to cheat the rules a little bit and c) I really need something to break up the expanse of Brazilian hardwood floor that I didn't pick but can never get rid ofbecause it's expensive and looks nice enough I guess. <-- sorry about that long run on sentence, Haley. (she's decided she's my blog editor. I think it's because she likes pointing out my faults. Little sisters, I tell ya.)

I want a large, somewhat rustic desk. I don't like the feel of working on flat, white, shiny plastic. It feels too much like actual work then. I guess it's a personal thing. BUT, cowhide, leather, rustic wood.. this is all starting to sound a little den meets dude-ranch, which of course is not what I'm going for. A sleek white chair, Moroccan pouf, and gallery wall made up of gold frames all help to add a little girl back into the equation.

The finish of the shelving was a tough spot for me... I don't want too-perfect, cold, white shelving, but I also don't want to introduce any more wood tones or masculinity into the space.

One of my favorite (but small) collections, and the one I was most excited about putting in the space is made up of a bunch of vintage jadeite bowls, candy dishes and vases. Adding some of that type of finish into the mood board spurred me to think about staining wood cabinets and shelving a girly color, and wouldn't you know it, Minwax makes a beautiful warm minty green stain called antique jade. Instead of having the jadeite contrast with the shelving, I think it will only highlight to put it on shelves that carry the color throughout more of the room.

5. Source and gather the pieces

Reasons to shop - yay! Needing money to get what you want - sad trombone. Sooo... now I'll start the process of accumulating the items I want in the space, and attempt to be patient enough so that I don't have to eat ramen noodles while staining cabinets. I'll update you on the progress of the office when there's something to update you on!

What spaces in your house have you stumped? How is your design process different than mine? I'd love to hear about it in the comments!

House Tour: My DIY Eclectic Entryway

entryway_wide.jpg

Happy New Year, everyone! When I gave you the before house tour on the blog, my first thought was "oh dang. Now I have to finish a room to have an after."

The house has been a constant work in progress since I moved in. I'm pretty proud of what I've gotten done so far, I just never feel like anything is really totally finished or perfect. But honestly, I don't know that I ever will. I'll always be moving things around as a find new treasures, or switching things up and going for a slightly different style. Andy really loves this about me - he tells me all the time how much he's looking forward to hauling yet another load of stuff and rearranging more furniture. Really.

But with this in mind, I decided it would be good to show you my entryway exactly as it is right now. There are still a few spaces I want something for, or pieces I'll switch out, oh, and it's still decorated for Christmas (I'll get the stuff down before February - I promise!).

As a reminder, here's how it looked bare bones in the listing pictures.

Now here's the after:

I found the midcentury buffet on craigslist for around $100. The wood veneer was pretty rough, but some primer and green-gray paint cleaned it up and made it look a lot more modern. The drawers provide great storage space, and the top gives me a lot of styling flexibility season-to-season.

For Christmas, it was the perfect place to display my very favorite decoration, my nativity set. I wanted to layer something on top of my large marble canvas print, and Hobby Lobby had chalkboards on sale, so I decided to hand-letter the silent night sign. The tray and bowl are perfect for dropping sunglasses, and giving a little shine to the space.

I never seem to take the extra time to hang a coat in the closet, so Andy helped me build this shelf with hooks for bags and a coat. I'm really happy with the way it looks, but it was so easy to put together. We just glued then screwed two 1"x8" pre-finished boards together, anchored it to the wall, then added a pre-cut piece of trim and the hardware.

Most benches were too wide to fit well in the entry, so I was thrilled when I found an old church pew on craigslist, and my wonderful Dad was able to refinish it with a LOT of sanding, and some gel stain. I have a big basket from Target at the end of the pew as an easy spot to throw small items like hats and mittens and scarves that would just clutter up other spaces or get scattered around.

The biggest and toughest projects in this fairly small space are also the ones that made the most impact. Here's a decorating spoiler alert for you: rugs are expensive. Most of the time, they're STUPID expensive. Like, it's actually tempting to make your own rugs out of rags expensive. BUT, every now and then a little luck and elbow grease can get you something awesome.

I found a cheap dhurrie rug on sale at esalerugs.com in some pretty awful colors. A cream rug with light pinks, blues, and green isn't exactly my jam, but it's nothing a little Rit Dye couldn't take care of!

I wish you all could have seen Andy's face when I told him I wanted him to help me dye and wring out a 12'x2' rug in the backyard in 45 degree weather. I'm sure our neighbors made similar faces trying to figure out what the heck we were doing...but like I said before, rugs are expensive, so this was worth it. We dyed the red and cream rug with navy blue dye, and it came out looking much more rich with blue and burgundy tones. SCORE!

The closet had wood veneer hollow core builder grade doors that I just thought looked cheap in the space. I took inspiration from the AMAZING Jenny Komenda of Little Green Notebook and decided to add some paint, textural fabric, paneling made foam core trim, and some new hardware. All those miter cut corners and getting the fabric smooth was a bit of a challenge, but I'm thrilled with how it turned out, and how it added a little glam to the space.

Getting the look of a pulled together entryway took a fair amount of DIY work, and a little craigslist luck, but it was totally possible on a budget. If there are any projects you want more details on let me know.